

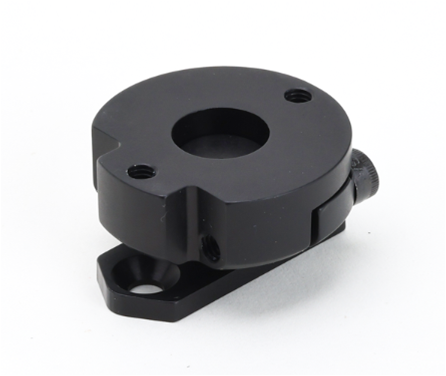


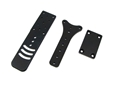
The Baller Boss Holster Hanger Ball Joint
Upgrade your Boss Holster Hanger with the new release from Shockbottle, the Boss Baller Ball Joint.
This ball joint upgrade for your Boss Hanger allows you to adjust the angle of the holster and still raise and lower it as you expect with the Boss Holster Hanger.
You can use the ball joint instead of the spacers on your current rig!
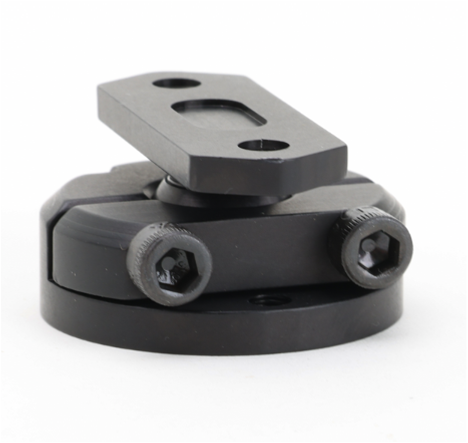
Includes:
- Complete Baller Ball Joint
- Hex L-Key With Standard Tip, 5/32" Size, 2-11/16" Overall Length
- Hex L-Key with Standard Tip, 1/8" Size, 2-3/8'" Overall Length
How to Install
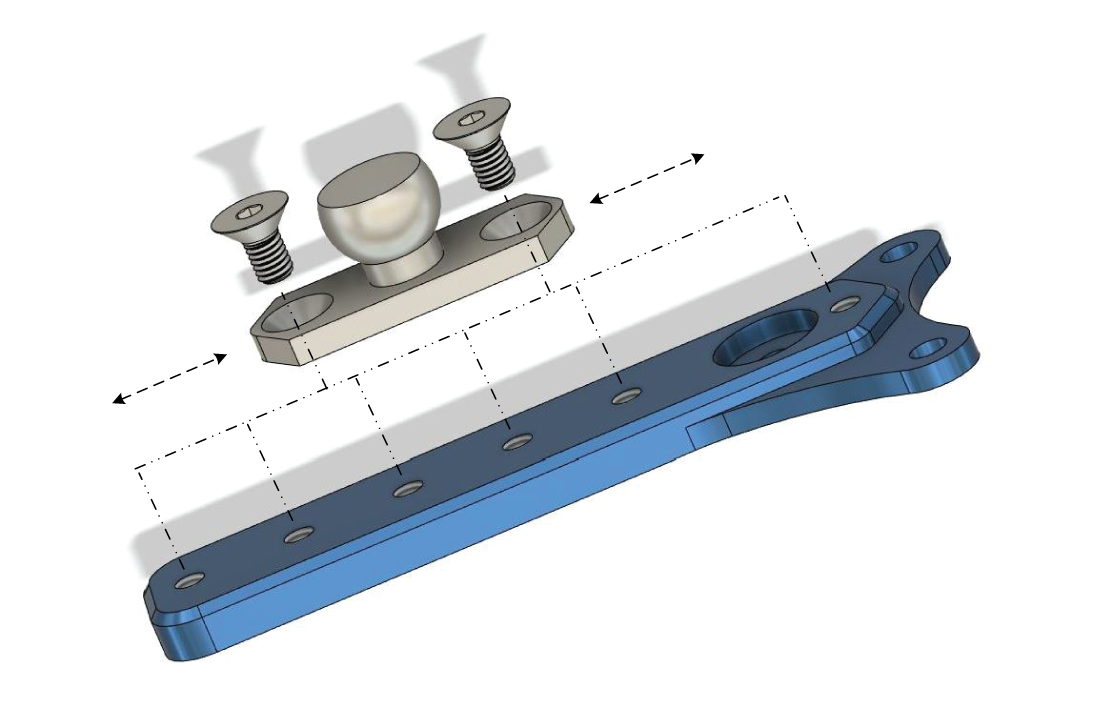
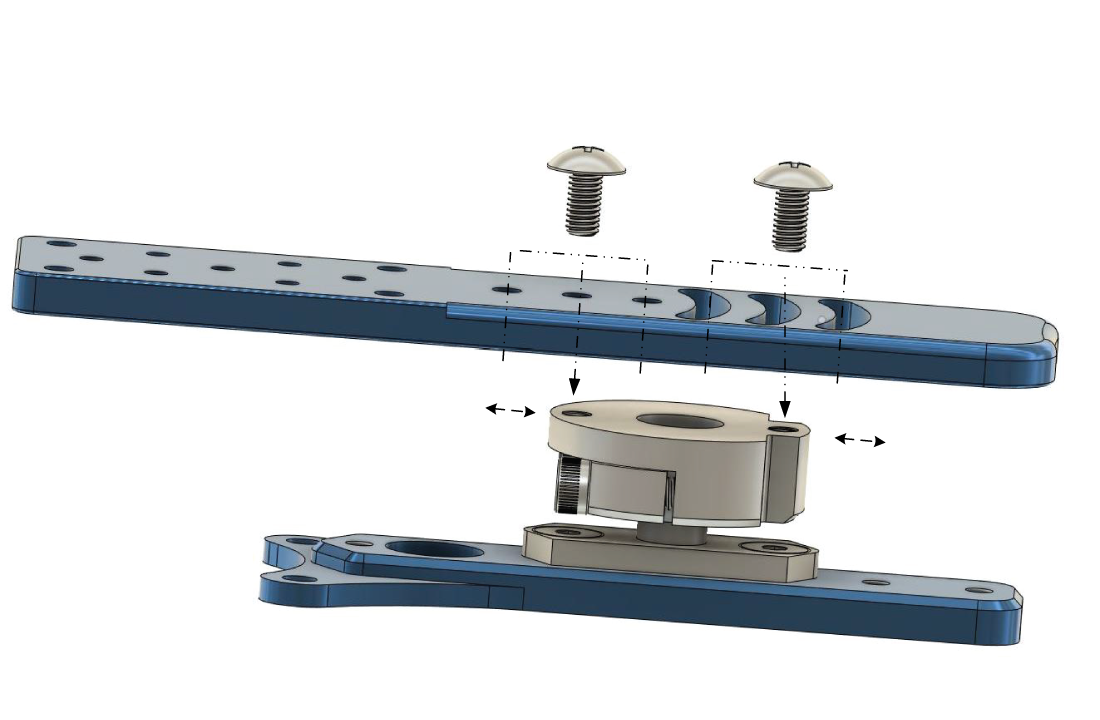
1) Remove existing screws and spacers between long plate and Y plate. If you already had a holster mounted, try using the same screw placements as a starting point, otherwise set it up in the middle and adjust later.
2) Attach Ball plate to Y plate using flathead screws. If the ball is assembled to the socket, loosen the clamp to release the ball. You will need a Y plate with countersunk mounting holes (most are, if yours is not we have them here) to locate the ball plate over holster pouch screws.
3) Stick the ball in the socket and lightly tighten clamp with clamp screws so ball moves with a little drag. (If you removed the clamp all the way, it should be installed with the bevels matching)
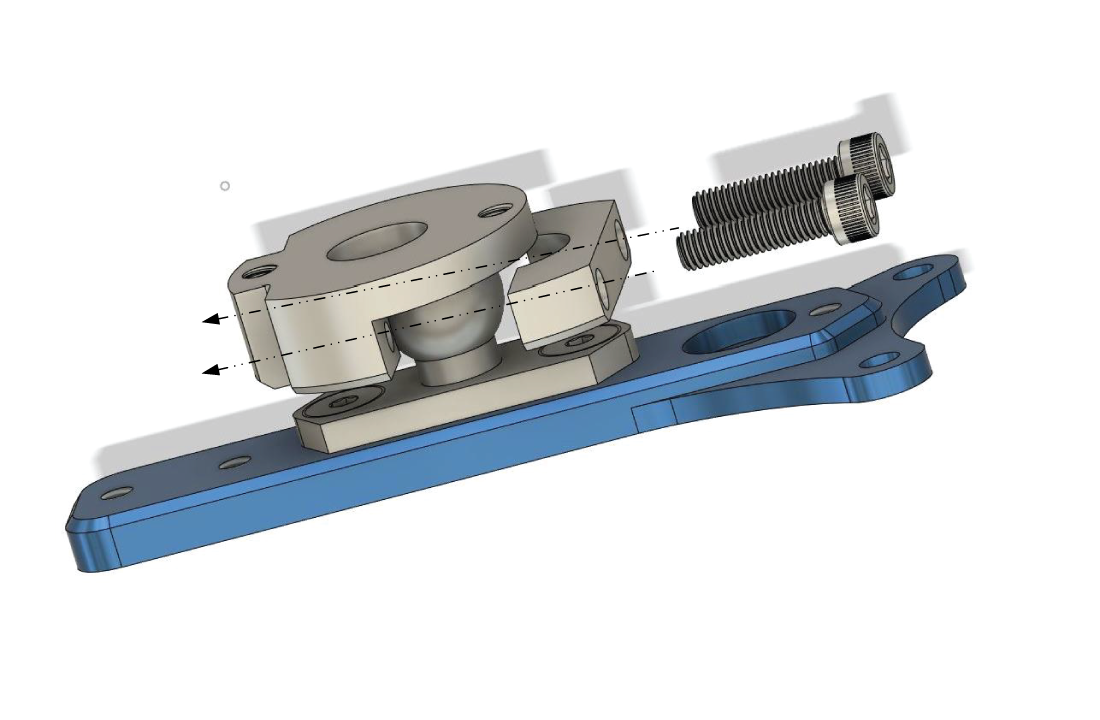
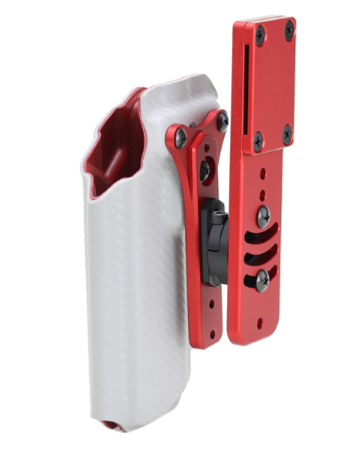
4) Attach Socket with ball and Y to Long plate. If you do it before clamping the ball into place, you may find the long plate screw blocks the clamp. Use the same holes you used before or the center curved slot to start. Arrange the clamp screws towards the belt end of the long plate for easier adjustment. If you need a little more tilt away from your body, you can reverse the socket plate so screws are downwards although this increases risk of lost parts and unplanned holster plummets.
5) Tighten clamp screws so ball movement requires some force. Adjust to preference and rules.
6) Tighten the clamp screws to lock ball movement. You can use lots of force on these screws (torque max TBD, but they will hold a couple thousand pounds each).
7) Test it. If you are super happy with where everything is, you can add some loctite or superglue through the small notch in the socket to coat the ball and fix it in place.
